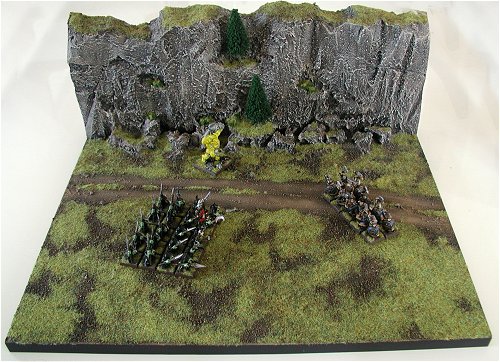
Skull Pass Demo Board デモ用ボード作成
by David on 2009-10-19 (Mon) 12:30PMA new store opened in Beppu last month, and in an effort to promote their activities I decided to make an eyecatching mini-sized display board for the Skull Pass boxed set. This would be placed outside the store during opening hours, and needed to be fairly hard-wearing. At a pinch, staff could also play demo games with a couple of units.
先月、別府市の販売店「リングテイル」が開店しました。店の前で歩いている人々をキャッチできるために、この小さい展示用ボードを作成しました。店の外に置くつもりですので、かなり強い材料で作りました。
Materials 必要なもの:

-
Scrap wooden board 木材板(指に強い)
-
Thick polystyrene sheet 発泡スチロール
-
Polystyrene cutter ホットワイヤーカッター
-
PVA Glue 木材ボンド
-
Instant cement, sand, paint, static grass インスタントセメント、砂、ペンキ、模型グラス
-
About 1500 yen total. 1500円ぐらいで作成できました。
1. Cut the cliffs 石作成

What demo board for Skull Pass would be without towering cliffs? The intention was to give vertical height to the board, which would also act as a good background for people wanting to take photos. The box set lids can also be displayed behind the board, for extra visual appeal.
I drew on a rough layout of cliffs and a dirt road, and then cut and carved (with a breadknife) the polystyrene to fit. In the center of the cliffs I added a couple of deeper ledges, which could contain small pine trees. Some broken chunks of polystyrene made fallen rocks.
ワイヤーカッターで絶壁の形を作った。パン用のナイフも使いました。車庫で見つけた板にボンドで貼り付けた。(20分)
2. Texturing セメント:

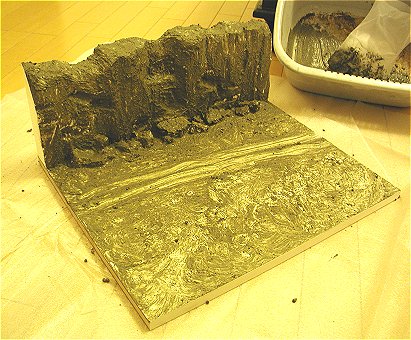
I wanted to hide the polystyrene patterns, make the cliff-face a little more random, and give more strength against prying fingers. So I mixed about 300g of instant cement in a fairly thin, sloppy mix and just spread it over the board and cliffs using my hand (in a glove!). Patting the textured surface on the board broke it up into random patterns. Finally, I 'drew' on the road by simply dragging two fingers across the wet cement in a wobbly line.
約300gのインスタントセメントと水を混ぜて、手でボードに塗りました。2本の指で道も書きました。(20分)
3. Extra texturing 砂:
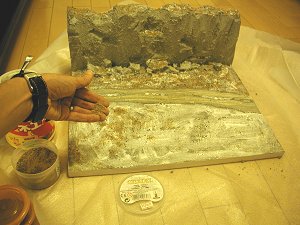
Next was a thin sprinkling of sand, to differentiate the ground surface from the cliff-face surface. It also added some extra protection against 'flake-off'. I watered down some PVA glue to about half normal consistency, and painted it on with an old brush. I used Citadel basing sand for the texturing, as it's light-weight and varied in size.
木材ボンドと水を混ぜて、約半分の濃さになりました。筆で塗って、ゲームズワークショップ製のベース用サンドを広げました。(20分)
4. Protection ボンドで塗装:
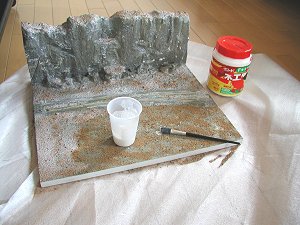
Mixing PVA down to about the consistency of milk, I quickly painted it over the entire model. This would hopefully ensure that all the texturing would stay on the board, rather than flake off over time.
木材ボンドと水を混ぜて、牛乳ぐらいの濃さで全体的に塗りました(強さのためにしました)。(10分)
5. Undercoat スプレー塗装
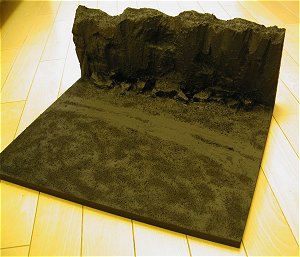
A quick spray with some polystyrene-friendly matte black paint, and it's ready for drybrushing.
発泡スチロールにやさしい黒スプレーで塗りました。つや消し黒でした。(10分)
6. Drybrushing ドライブラッシング

I used two small pots of acrylic paint from my local DIY store for drybrushing. Light brown was drybrushed quite heavily over the whole model with a half-inch brush, taking care not to leave streaks. Light grey was then drybrushed lightly over the cliffs and rocks. You can see the exact shades in the palette on the left.
薄いブラウンで全体的にドライブラッシングしました。ペンキを筆に載せて、キッチンペーパーでほとんど拭いてというのは「ドライブラッシング」を呼びます。それから、薄いグレーで石をドライブラッシングをしました。(60分)
7. Static grass 草:
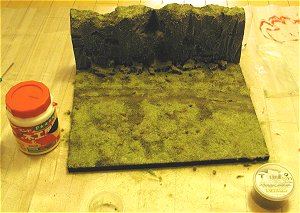
The last stage involved painting a milk-like mixture of PVA and water onto the clifftops and ground in patches, and loosely sprinkling static grass over the top. I used little clumps of 'Scorched Grass', and then plenty of the light-coloured 'Glade Grass'. Let it dry, and then blow off the excess onto a large sheet (outside!). Glue on some trees and it's finished.
また木材ボンドと水を混ぜて、牛乳ぐらいの濃さであっちこっち塗りました。ボンドの上にゲームズワークショップ製の「貼れ草」を広げました。それから、貼っていない草を吹いて、完成でした。(30分)
Finished! 結果:
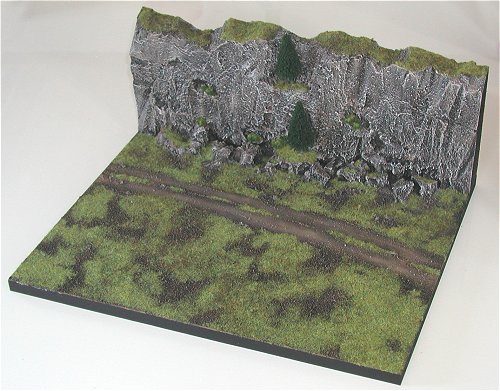
A hard-wearing mini-gameboard just big enough to accommodate a few units of models, and small enough to fit anywhere. Looking forward to seeing this in action!!
